The problem with K-x' AF system is that its tolerance for the final focused point is too large, although it hunts less and achieve focus faster. Moreover, the crappy loose QC standard at the Pentax factory is yet a problem. Putting aside the large inconsistency of the AF, there is a baseline focusing error exists in both K-x units I tested, both are back focusing in general, for the average focus point the camera units that would select, putting aside the AF inconsistency they have for what I have just mentioned.
As there is a method to open the Debug Mode menu as disclosed previously by someone, I simply tried that and succeeded! This time, I would write a quick tutorial with the relevant screen captures for the AF adjustment in my this Blog Post.
May I repeat for what you need to do is to create a file "MODSET.492" with the line [OPEN_DEBUG_MENU], which must be followed by a Enter [CR] Character. If you don't know how to create the file, simply Download it Here, for the file I created.
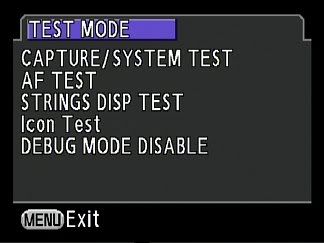
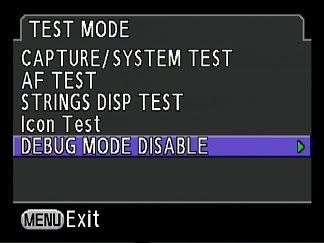
Copy the file to the Root of your SD card. Press the Av/+/- Button while turning on the camera, then you will enter into the main Debug Mode menu and screen, as seen below:-
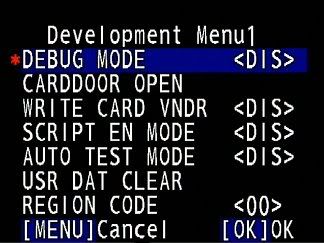
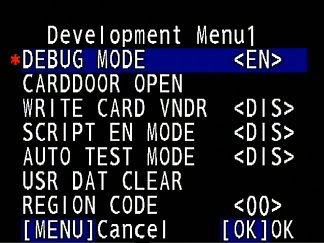
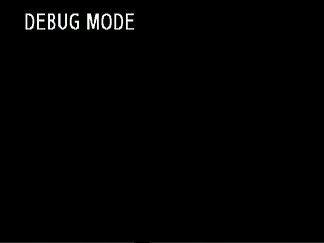
Select the first Item for the Debug Mode from "DIS" (Disable) to "EN" (Enable) by pressing the Left or Right Arrow. Then press the OK button, you will be in the "Debug Mode"!:-
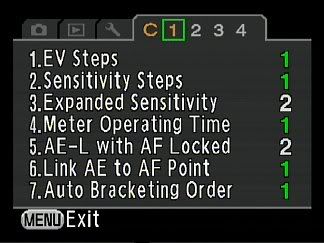
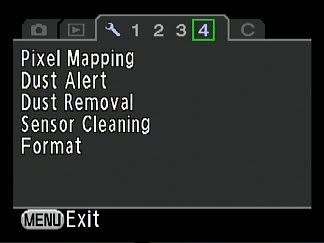
Press the main Menu button, the AF Adjustment function is placed under the new "Test Mode" function which can now be found as a new Tab in between the Custom setting menu No. 1 and the Setting menu No. 4. Turn the e-Dial to the Left after pressing the Menu button and you can access the new Test Mode menu quickest:-
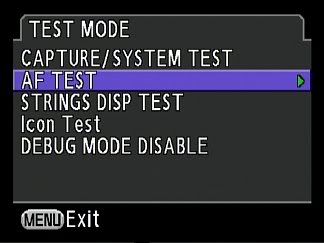
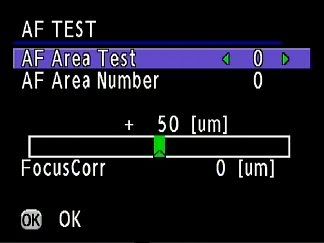
Now under the Test Mode Tab, there is an Item named "AF Test", simply enter into it to see its set value and to use the function:-
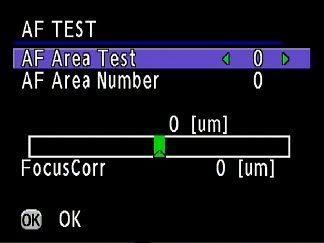
The Treasure and Cure is now here! By default, everything is at Zero values as seen in the above. Btw, don't change the "AF Test" and "AF Area Number", keep them both at the default Zero 0. What I am interested is to adjust the central AF point only and to eliminate the Back Focusing tendency that I have encountered. To do the adjustment, just pull down to the "FocusCorr" Item to change the parameter..
Before doing the adjustment, I would give an important hint for how to use a PROPER TARGET for to check the AF! DON'T use any those 45 Degree AF Test Chart, NO MATTER it is the original "Nikon D70" one nor those variants that are copied from the idea of that chart! SIMPLY use a completely flat surface with good contrasty pattern on it under daylight (or artificial white light) as the target for AF adjustment. You can place the three target stacking one from the other in steps so that you can have more idea on the Front Focusing or Back Focusing during the focus adjustment. Like this setup, for example, focusing on the middle distance object in the centre of the staired targets:-

(Above: My Old Setup in testing the AF Accuracy (actually it should be the Inaccuracy) of my old *ist DS)
Now, enter the Trial Value for the Adjustment. If you encounter Back Focusing, try entering a +ve (Positive) Value. In contrast, if you experience Front Focusing, enter a -ve (Negative) Value. After you entered the Correction Value, the value will be updated and stored:-
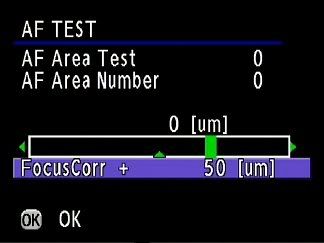
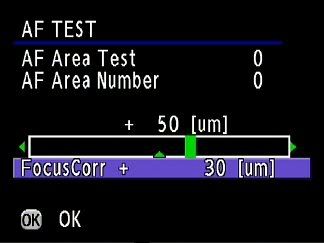
Do note that the value for the FocusCorr is not Absolute but Relative, it indicates the Change (Delta) to the current stored value above the adjustment bar. Just say if a further +30um is entered, the new value for the adjustment factor will become 80 (um):-

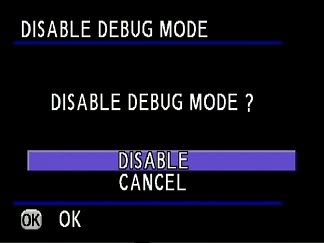
After completing the calibration and adjustment, do remember to leave the Debug Mode as follows. Turning Off the camera does NOT disable and leave the Debug Mode!
Eventually, I found that the value of +70 (um) works well for my K-x and now focusing at large aperture, say, f/2.0 with my FA 43 Limited is way more accurate no matter at dim environment or on bright days outdoor. In fact, even stopped down shots can be seen to be even sharper with more accurate AF! Really Nice!
Do also remember to use infinity object to check for the focusing accuracy for far objects (which might be affected also when you have changed the above value).
Besides, if you just want this AF Adjustment "Feature" to be available all the time. Simply leave the MODSET File left at the Root of the SD card so that you can call out the Debug Mode Menu whenever you need it (and Disable the Debug Mode when done, I suggest).
As a final reminder, you are advised that don't touch and play with other items in the Debug Mode Menu. Do the thing you know what it is doing for you (as I have told and shared here, for example) and don't play other things that you have NO REASON to touch and take the risk! Do remember that if you change things that you don't know would eventually mess up your camera in a serious way! As a second final reminder and disclaimer, do anything at your own risk and you bear all the responsibility and consequences for anything that you do yourself!
P.S. The above Debug Mode Entering Method and Screen Captures are for Firmware Version 1.00 (Only?), I have not tried if it works with Newer Firmware 1.01 or Not. If you want to Adjust the Focus, just Keep the Original 1.00 Firmware and it is Possible for Pentax to have banned the Above Method in the Latest Firmware. (And, if any K-x user who Has Upgraded to the 1.01 Firmware and found that if this Still Works or Not, please let me know!)
Read Also:- K-m Debug Mode Unleashed! (For AF Correction)