Web Analytics RiceHigh's Pentax Blog: Documentation
Showing posts with label Documentation. Show all posts

Tuesday, December 21, 2021

K-r Service Manual

Someone at the PF forum uploaded the manual in two parts and it is available for download here and here.

For your reference and use just in case. And, it can be appreciated that how sophisticated a DSLR could be, for all those adjustments that required or provided.

Wednesday, February 15, 2017

Friday, April 01, 2016

K-1 User Manual Available for Download (Unofficial)

https://www.dropbox.com/s/penzi21ucajn0lb/K-1_Operating_Manual.pdf

Friday, April 03, 2015

Pentax User Manuals Download April 2015

http://www.ricoh-imaging.co.jp/english/support/download_manual.html

For DSLRs, user manuals and guides from K-s2 to *ist D are available. For instance, the manual for the new Image Transmitter 2 is also uploaded, too.

I have re-downloaded 15 models of the Pentax cameras that I bought over years on the list! ;-D

Thursday, October 24, 2013

K-3 User Manual is Online

http://www.ricoh-imaging.eu/media/b8320cbe10de8415d32b5e0d641b6d19/K3-OPM-EN.pdf

For those who concern.. (me exclusive~)

Monday, October 07, 2013

K-3 Full Specs

Product
K-3

Type
Digital SLR

Sensor
Type: CMOS w primary color filter and integrated Shake/Dust Reduction sensor movement system
Size: 23.5 x 15.6mm
Color depth: 8 bits/channel JPG, 14 bits/channel RAW
Effective pixels: 23.35 MP
Total pixels: 24.71 MP

Recorded resolutions
Still: Jpeg –
L (24M:6016x4000),
M (14M: 4608x3072),
S (6M: 3072x2048),
XS (2M: 1920x1280)
RAW – L (24M:6016x4000)

Movie (resolution/FPS):
Full HD (1920x1080, 60i/50i/30p/25p/24p)
HD (1280x720, 60p/50p/30p/25p/24p)
Quality levels: ★★★ Best, ★★ Better, ★ Good, RAW (14-bit)

Dust Removal: DR II (ultrasonic vibration to low pass filter) with Dust Alert function

Lens
Type/construction: PENTAX KAF2 bayonet stainless steel mount
Usable lenses: PENTAX KAF3, KAF2, KAF, and KA (K mount, 35mm screwmount, 645/67 med format lenses useable w adapter and/or restrictions)
SDM function: Yes
Power zoom function: Yes (power zoom only)

Focus System
Type: SAFOX 11 TTL phase-matching - 27 point (25 cross type focus points in the center)
Focus modes: AF Single (w focus lock, focus/shutter priority selectable), AF Continuous (w focus/FPS priority selectable), Manual
Focus point adjustment: Spot, Select, Expanded Area (S, M, L), Zone select, Auto (27 AF points)

Viewfinder
Type: Pentaprism
Coverage (field of view): 100%
Magnification: 0.95X (w 50mm F1.4 at infinity)
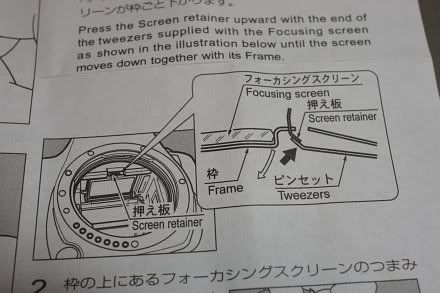
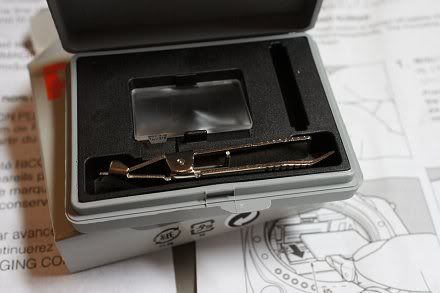
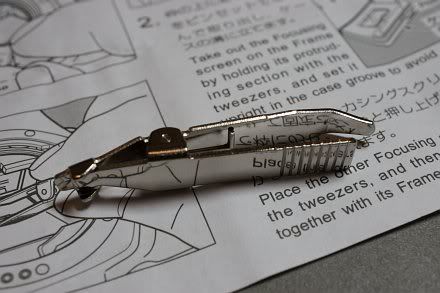
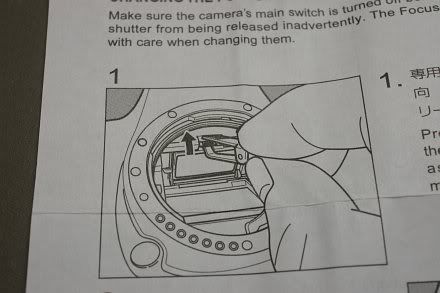
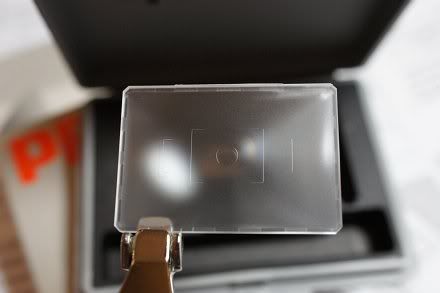
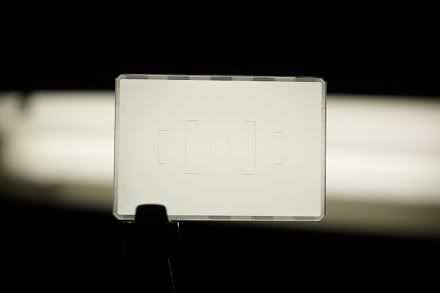
Standard focusing screen: Natural-Bright-Matte III (interchangeable)
Diopter adjustment: -2.5m to 1.5m
Depth of field preview: Optical (diaphragm stop-down), Digital

LCD Monitor
Type: 3.2” TFT color LCD with brightness/saturation/color adjustment AR coating and air-gapless glass.
Resolution: 1037K dots
Wide angle viewable: Yes

Flash
Type: Retractable P-TTL popup flash
Guide number: 13m (ISO 100)
Coverage: 28mm wide angle (equiv 35mm)
Flash modes: Auto, On, Redeye, Slow Sync, Slow Sync + Redeye, Trailing Curtain Sync, High-speed sync, Wireless, Manual
Flash exposure compensation: -2 to 1 EV (1/2 steps)

External Flash
Type: Hotshoe (P-TTL), high speed sync and wireless w PENTAX dedicated flash, X-Sync Socket
Synchronization speed: 1/180 sec

Storage Media
Internal memory: n/a
Removable memory: SD, SDHC, SDXC, EyeFi, FLU

Interfaces
Ports: USB 3.0 hi-speed, AV out, HDMI out, DC in, cable switch, 3.5mm stereo microphone, X-sync socket
Video out: HD (via HDMI), NTSC, PAL
Printer interfaces: n/a

Power Supply
Power source: Rechargeable Li-Ion battery D-LI90, D-BG5 Battery Grip (optional) with trays for 2nd D-Li90 battery or 6x AA batteries

Recordable images: Approx 720 (approx 560 w 50% flash, CIPA)
Playback time: Approx 370 min
Movie recording time: Approx 25 min (automatic overheat shutdown protection)
AC adapter available: Yes - (optional) K-AC132

Physical Specs
Body dimensions (W x H x D): 5.17in x 3.94in x 3.05in
Body weight
Without battery or removable memory: 25.2 oz
Loaded and ready: 28.2 oz

Construction material(s): Magnesium alloy shell over metal chassis
Weather resistant: Yes (92 special sealing parts)
Operating temperature: 14-104°F (-10 to 40°C)

Language Support
English, French, German, Spanish, Portuguese, Italian, Dutch, Danish, Swedish, Finnish,
Polish, Czech, Hungarian, Turkish, Greek, Russian, Korean, Chinese
(Simplified/Traditional), Japanese

Image Stabilization
Type: Sensor-Shift Shake Reduction with rotational compensation (3.5EV TBD)
Electronic level function: Yes, verification via viewfinder and LCD panel

Metering System
Type: TTL open aperture metering using 86K pixel RGB sensor
Sensitivity range: EV -3 to 20 (ISO 100, 50mm F1.4)
Multi-Segment: Yes
Center weighted: Yes
Spot: Yes
Exposure compensation: +/- 5 EV (1/3 and 1/2 steps)
Exposure lock: Yes
Exposure bracketing: Yes (2, 3, or 5 frames, up to +/- 2 EV in 1/3 or 1/2 steps)

ISO Sensitivity
Auto: ISO 100-51200 (1, 1/2, 1/3 steps), Auto ISO range selectable,
Bulb mode: Auto ISO n/a
Manual: 100-51200 (1, 1/2, 1/3 steps),

White Balance
AUTO WB, Multi Auto WB,
Daylight, Shade, Cloudy, Fluorescent Light (D: Daylight Color, N:Daylight White, W:Cool White, L:Warm White), Tungsten Light, Flash, CTE,
Manual mode(s): Yes, Manual WB (up to 3 settings), Color Temperature Configuration (up to 3 settings), Copying the white balance setting of a captured image* WB fine adjustment available in all modes

Shutter
Type: Electronically controlled, vertical-run, focal plane shutter
Shutter speed: 1/8000 to 30 sec (1/3 or 1/2 EV steps), Bulb

Capture Modes
Mode selection: Green, Hyper Program (P), Sensitivity Priority (Sv), Shutter Priority (Tv), Aperture Priority (Av), Shutter & Aperture Priority (TAv), Metered Manual, Bulb, X-Speed, USER (3 presets).
Custom Image Modes: Bright, Natural, Portrait, Landscape, Vibrant, Radiant, Muted, Bleach Bypass, Reversal Film, Monochrome, Cross Processing,

HDR: Auto, HDR1, HDR2, HDR3, Exposure Bracket Value adjustable, Automatic composition correction function
- All include gamut radar and fine adjustment of saturation, hue, high/low key, contrast, and sharpness (regular and fine adjustment scales). Monochrome mode includes adjustments for filter effects (green, yellow, orange, red, magenta, blue, cyan, infrared), toning (sepia, warm/cool), high/low key, contrast, and sharpness (regular, fine, and extra sharp adjustment scales).

Green simplified mode available: Yes
P/A/S/M/B: P, A, S, M, B (extended modes Sv, TAv)
Date stamp: n/a

Digital filters (capture): Extract Color, Toy Camera, Retro, High Contrast, Shading, Invert Color, Unicolor Bold, Bold Monochrome
Data record: Folder name (standard, date), file name (standard, customizable), embed copyright.

Drive Modes
Mode selection: Single, Continuous (H,M,L), Self-Timer (12s, 2s), Remote (0s, 3s, continuous), Exp. Bracketing (standard, timer, remote), Mirror up (standard, remote), HDR Capture (3 shots at 1EV, 2EV, or 3EV, 3 blend settings plus Auto, pixel alignment)
Multi-exposure: Composite Mode (Additive/Average/Bright) Number of Shots (2 to 2000 images), Interval 2000 shots, 2 sec to 24 hrs, time delay available)
Continuous FPS (JPG ★★★)
- Continuous H: Approx 8.3 FPS (60 JPG, 23 RAW)
- Continuous M: Approx 4.5 FPS (100 JPG, 32 RAW)
- Continuous L: Approx 3.0 FPS (200 JPG, 52 RAW)
Self-timer: Yes (12s, 2s)
Remote control: Yes, infrared (0s, 3s, continuous), cable switch

Playback Modes
Mode selection: Single frame, multi-image display (6,12, 20, 35, 80 segmentation), display magnification (up to 16, 100% display and quick magnification available), rotating, histogram (Y histogram, RGB histogram), bright area warning, Auto Image Rotation, detailed info, Copyright Information (Photographer, Copyright holder), Folder Display, Calendar Filmstrip Display, Slide Show Mode pallet: Image Rotation, Digital Filter, Resize, Cropping, Slideshow, Save as Manual WB, RAW Development, Index Print, Protect, Movie Edit, Extract JPG from Movie, Magnification: up to 16X, scrollable, quick magnification.
Digital filters (playback): Base Parameter Adj, Extract Color, Toy Camera, Retro, High Contrast, Shading, Invert Color, Unicolor Bold, Bold Monochrome, Tone Expansion, Sketch, Water Color, Pastel, Posterization, Miniature, Soft, Starburst, Fish-eye, Slim

File Formats
Still: RAW (PEF, DNG), JPG (EXIF 2.30), DCF 2.0 compliant
Movie: MPEG-4 AVC/H.264(MOV) - JPEG(AVI) for internal movie record

Custom Functions
Functions available: 27

Computer Requirements
*For device connectivity. Bundled software requirements may vary.
Windows: Windows 8 (32 bit/64 bit) / Windows 7 (32 bit/64 bit) / Windows Vista (32 bit/64 bit), Windows XP SP3 (32 bit)
Mac: Mac OS X 10.8 / 10.7 / 10.6

Battery Life
Power source: Rechargeable Li-Ion battery D-LI90, D-BG5 Battery Grip (optional) with trays for 2nd D-Li90 battery or 6x AA batteries

Recordable images: Approx 720 (approx 560 w 50% flash, CIPA)
Playback time: Approx 370 min
Movie recording time: Approx 25 min (automatic overheat shutdown protection)
AC adapter available: Yes - (optional) K-AC132

Dimensions
5.17in x 3.94in x 3.05in

Sunday, September 15, 2013

AF Fine Adjustment: "Apply All" and "Apply One" Fully Explained


Quite some time ago, I explained how to focus adjust a K-5 camera using Live View. However, there are some confusions amongst Pentax users over time for the meanings and effects of the "Apply All" and "Apply One" settings. So, I opt to explain more this time. Well, the user manual tells nothing useful about these once again, just see page 126 of the K-5 user manual! >:-(

For a camera like the K-5 and K-30/50/500 which lacks a f/2.8 sensors, this "AF Fine Adjustment" is crucial so as to compensate the spherical aberration that exists on all lenses when stopped down against wide opened, which causes the camera to mis-focus depending on the amount of differences. It is because the AF system actually measures the more central part of the lenses optically for those f/5.6 AF sensors.

So, here we go, we have four scenarios:

1. Nothing is Set:


This is essentially the same as to set in the Custom Function that the "AF Fine Adjustment" is Turned Off / Disabled.

2. "Apply All" is Set but "Apply One" Not:


So, All lenses will use the "+5" setting as shown in the above example which is obvious. Do note that a +ve setting is meant to instruct the camera to focus fronter (to compensate back focusing) and vice versa for a "-ve" value to instruct the camera to focus backwards (to compensate front focusing).

3."Apply All" is Not Set and "Apply One" is Set (for Individual Lenses):


This is also obvious, the "Apply One" setting will take effect when individual lens is mounted of which the lens identity number is detected (for a Pentax F AF lens or later). So, I now know why the official user manual just tells you "Apply All" means apply all, "Apply One" means apply one or something like that but no more! ;-p

Choose this only if your camera does not contain any AF error primitively by itself, like my own K-5 unit which is a perfect copy already! :-D

4. Both "Apply All" and "Apply One" are Set:


Well, what does it mean under this case? Is it actually +2, +5 or +7?? What do you think? :-o For what I checked, it is actually +2, that means that the "Apply One" setting overrides the "Apply All". Whilst this does make sense somehow but however, the "Apply One" is not applied on top of the "Apply All" as many Pentax users wished!

Btw, if you have a copy of your Pentax camera which needs some slight adjustment by itself for *all* lenses, i.e. sample variations with some system errors, set both and remember to individually calibrate all your lenses unless the "Apply All" already works for all your lenses, i.e. scenario #2! Frankly, if you have more prime lenses like me, calibrating each lens is inevitably unavoidable!

Last but not least, some people would be puzzled for what to do with a cheap DAL or even "DA" lenses which does not have a focusing mark (namely, the DA35/2.4, DA50/1.8 and the DA40/2.8XS lens). Well, what you need to do is to put on a sticker and make the mark yourself before doing any further calibration! See the following example. :-)


Besides, some people would still wonder, do the K-5II/s need such "AF Fine Adjustment"? My answer is Yes, if you are using really Fast Prime like the DA*55/1.4 or just an old FA50/1.4 and etc., of which spherical aberration still occurs in between the widest aperture of f/1.4 down right to the f/2.8 aperture where the AF is detected and measured. So, the above techniques do still always apply! And also don't forget that not every copy of the K-5II/s is perfectly quality controlled when it was produced from the Pentax' (and now Ricoh's) factory.

Wednesday, September 11, 2013

My Best Optimal Custom Image (Colour) Setting Combination for the Later Pentax Digital Bodies

Well, here it is:


The above was first tested out with my K-5, of which the hue output was always not correct for most of my Pentax digital lenses for all of the built-in custom image profiles, even for the Natural profile, which was supposed to be colour accurate. So, I sat down to think what's wrong and observed quite some of my old photos made with the K-5..

My conclusion was that green colours are lacking yellow. Skin tones are lacking red, orange colours could contain more red. Thus and therefore I made the above hue shift. Btw, the most unfortunate thing is that no official documentation could ever tell the user what are the actual effect and meaning for changing this setting! >:-o Nonetheless, one drawback of the above is Blue colours now contain more green, thus they could be more cyanish. But the factory defaults are too blueish for many things anyway!

Still, two obvious problems with the Natural mode is the lower contrast and saturation for most lenses and shooting situations and thus I bumped up both for 1 step. As for the sharpness, I found that the standard Sharpening method (parameter set) is yet the best and 1 step up will make the JPEG directly out of camera to be more usable, while balancing well with both sharpening artifacts and noise.

On the other hand, I noticed that some Pentax users said that the K-5 series bodies are a bit cool for the AWB. But actually I don't find the same. The AWB is accurate but the problem primitively lies with the wrong hue shift. In order to verify this, just set the camera in preset white balance in particular the daylight WB and then shoot under sunlight, this can be proven and confirmed, example test here. For instance, that is something like what they set:


So, the ABOVE is NOT recommended! The incorrect hue shift will not be completed corrected but yet new yellow cast will be introduced for quite some situations. After all, my recommendation is to leave the AWB at default settings, ONLY changing the colour profile is needed and will work.

With the same optimal colour profile used with my K-5, I put it into my Q and it still works like a charm! :-D


After all, I would not post any of my sample images this time. Just try it out yourself to see if it is better or much better and things have actually improved! :-) And, I am always happy to share even everything could just be "useless as usual", as what my haters and fanboys said! ;-p

Wednesday, February 06, 2013

Full Review: K-5 Wi-Fi, Q Wi-Fi and EOS 5D6! ;-)


(Above: My New 5D6!~)

Background

I bought this and all my current cameras have now suddenly become Wi-Fi capable! :-D


So, my Pentax Q is now the Pentax Q Wi-Fi, my K-5 is now the K-5 Wi-Fi and my 5D3 is the 5D6 now, which is actually a 5D3 with some of the Wi-Fi features of the 6D two in one!~

Basic Operation

This card has two transfer/connection modes, the first is that the card acts as a Wi-Fi Access Point itself, which is called the "Direct Mode" by the maker and the second is that the card logs in a common Access point so that it can communicate with all other mobile devices that are connected to the same LAN under that AP, which is named as the "Internet Mode".

Software

Install the App for the OS of your device, then photos/videos in the card can be browsed, selected and downloaded. Actually there is nothing to set up for the card and device, what you need to set is only the login username and password when the card acts as an AP (for your mobile devices to log in) and also the AP(s) that the card is to be connected, which a maximum of three AP logins can be remembered. For better security, the user may also wish to change the default admin login and password. That's all of it!

For other devices with other OSes other than the above, e.g., a laptop runs on Windows, the SD card still provides a webpage interface to do the jobs for the same function set. The internal IP address for that webpage is http://192.168.11.254/.

Btw, the full user manual and working instructions of the cards (in 16 and 32GB) can be downloaded from the official Transcend website here.

Compatibility

It should be noted that Transcend has maintained an official list of compatible and incompatible cameras with their this model of the Wi-Fi cards, which they have fully tested, I believe. In fact, my card was programmed with the Firmware version 1.4 which I found was really not compatible with my K-5 (even with the latest Pentax firmware 1.14), but it did work well with both my Q and 5D3 instead. So, their compatible and incompatible lists are 100% correct for what I tested!

So, what I did was to update the firmware to 1.5 (which can be found here, together with full update instructions) and after that I was happy to find that it also works in my K-5 now! :-D Btw, I have not tested it with my other cameras (many) but I hoped that it will work eventually!

Connection Speed and Stability

Overall speaking, I found that the connection is stable and transfer is fast for the "Direct Mode", while in the "Internet Mode" the performance is not that good and it is rather slow, although the connection did not break anyway, last time I tried. I have tested it with my above three cameras and no problem of any was found. One important tip to keep the Wi-Fi connection alive is by always keeping the camera awake when Wi-Fi is needed. This can be easily achieved by either seting a longer power save activation time or to half-press the camera more frequently from time to time when needed.

Power Consumption

As for the power consumption, as any other WiFi cards and devices, it uses up the battery juice quite a bit and the card will become warm after a certain period of use. I found that for device that has a small capacity battery like the Q should be used more cautiously whilst for devices that have a larger battery like my 5D3 and K-5, it is much a lesser problem.

There is one tip of mine to save power yet, that is, to set the auto power off to one (1) minute for the time-out period after the card is powered on but not connected. And at the same time, the camera's auto power off time limit could be set to longer, e.g., 4 minutes for my 5D3 after idling. So, the WiFi SD card will become a normal SD card without wasting power to transmit RF when it is actually not connected - best of both worlds. :-D

Supported File Types

The card and software should support all common photo and video file types. It fully supports JPEG directly without the need of installing any external App. As for other more special file types like the PEF and DNG etc., I have tested it with my Pentax Q in RAW(DNG) mode and it does fully work also! Just press hold (instead of just click directly the file, which will launch the associated App) or use the selection function (if there are more than one files in folder) and download the selected DNG files under the Transcend App's Browser (under the "Others" File Type Tab) and then you can start working with any installed App that can handle the DNG files after they are downloaded. Ditto for the MOV/AVI video files, which can be downloaded under the "Video" File Type Tab instead.

Trick for Using with the 5D3

Btw, there is a special using tip of mine with the 5D3, I think, i.e., with its dual card slots and flexible saving configuration options, I set to record separately with the CF and SD cards. Whilst for the CF card I set to the best quality JPEG or RAW as needed, I set for the SD card to record a small 2.5MP "S2" JPEG which is far smaller and thus much faster to transfer to my mobile devices. Just see the illustration below:-


Conclusion

All in all, this Transcend card is the best buy I can find now and I am impressed with the support, stable software and continuous improvement of its software (including firmware) as a whole package. It is a Class 10 card in 16GB for mine, and it is much cheaper when compared with other (older) alternatives such as the Eye-fi and the Toshiba FlashAir for the same storage size and speed. Do note that both the Eye-fi or FlashAir does require a first-time setup at the computer instead of capable to do the transfer On The Go with *any* Wi-Fi device like that the Transcend can do, without the need of a setup computer. Nonetheless, there are other options of Wi-Fi SD cards like those made by the Chinese brands of PQI and EZ-Share etc., but I do trust Transcend more for the SD card itself as a storage mean as the brand is more famous and well known.

Sunday, November 25, 2012

Prime M Cameras Have Only Electronic SR for Video Recording

Two weeks ago, Blog reader "daedbird" first reported that the video recording quality of his K-01 was greatly degraded when the SR was turned on against off. When the SR was activated, obvious rolling shutter effect was seen.

Yesterday, another Blog reader "kadajawi" has responded and writes that it is all about the electronic SR that is actually adopted for all those Prime M Pentax cameras for the Movie mode, K-30 and K-01 inclusive. On the other hand, the K-5 cameras which have the Prime II processor use the hardware SR, i.e., sensor movement, to compensate for the hand shake during video recording.

To verify this, I have checked the online user manuals of the K-30, K-01, K-5 and the K-5II/s as well. It is found that the SR for Movie is defaulted to On for the K-30 and K-01 whilst for the K-5 and K-5II, it is default to be Off instead. So, the supposition of "kadajawi" seems to be true for that "coincidence". Nonetheless, no Pentax manual has ever told anything about the actual SR method and the working principle of it, which yet looks like top secret of their cameras but which we users should actually know about.

Yes, the electronic SR is noiseless but it sacrifices video quality. The mechanical SR is noisy but this problem can be overcome by mounting an external microphone with a shock mount. So, all in all, this is not a real problem and better sound reception quality is gained with the use of an external microphone (and with stereo sound recording possibility too). In practice, my own experience that is the body sensor SR is very useful for handheld video recording to stabilise the video and this feature is still useful when monopod is used.

After all, I think Pentax should give all the Prime M users an option, in the firmware and user menu, for the choice of the SR method via electronic (software) mean or yet the conventional mechanical one, then that would be the best.


Related:- 

Definite Guide on External Video Microphone Selection for Supported DSLRs (Brand Regardless)

A Not-so-common K-30/K-5/K-01 Comparison of Mine

Sunday, October 21, 2012

K-5II User Manual is Put Online

http://www.pentax.jp/english/support/man-pdf/k-5-2.pdf

Last time I have searched for the whole document, there is no information of any for mentioning about the f/2.8 AF sensor for this "new" camera. So, the mystery about its layout and compatibility / usability with different lenses are yet unknown!

Speaking of the K-5II, IR has put their measurbation RAW(DNG) and JPEG files onto their website. So, pixel peeping time again! (Via 1001 Noisy Cameras.)


Related:- 

What is the Exact Layout of the f/2.8 AF Sensor(s) in the K-5II/s?

Thursday, July 19, 2012

A Not-so-common K-30/K-5/K-01 Comparison of Mine

I am not comparing every parameter of the official published specs, but am doing a concise summary and comparison on what are really different, official or not, and for those more important things that are obvious or not! :-D


K-30 K-5 K-01
Body Material
Plastic
Metal Alloy Cover
Aluminium Cover
ColoursThree (Nine in Japan, two different finishing, glossy or matte)
Two (Black and Silver)
Three different combinations
Weather Sealed
Yes
Yes
No
Dust Removal
SR Shake (Ineffective)
Ultrasonic (Effective)
SR Shake
Battery Power
D-LI109P or four AAs (with Adaptor)
D-LI90
D-LI90P
Expanded ISO Range
100-25600
80-51200
100-25600
RAW Format
DNG
PEF or DNG
DNG
ADC (RAW) number of bits
12
14
12
Top Tv
1/6000s
1/8000s
1/4000s
Video Format Differences
1080p/30 frames or 720p/60 frames MPEG4 (motion compressed) in MOV file format (container)
1080p/25 frames or 720p/30 frames Motion JPEG (Not motion compressed) in AVI container
1080p/30 frames or 720p/60 frames MPEG4 (motion compressed) in MOV container
Re-AF during Video Recording
Yes
No
Yes
External Stereo Mic JackNo
Yes
Yes
Manual Video Settings
Yes
No
Yes
Remote Cable Switch JackYes
Yes
No
Focus Peaking
Yes, No during Video Recording
No
Yes, No during Video Recording
Interchangeable Focusing Screen
No
Yes, 3 types
Not Applicable
Support O-GPS1?
Yes
Yes
No
Support Vertical Grip?
No
Yes
No
AF Method/Option:
11-point phase-matching AF (9 crossed with yellow light sensor, 3D continuous tracking, zone selectable) plus LiveView CDAF
11-point phase-matching AF (9 crossed with yellow light sensor) plus LiveView CDAF81-point contrast-detection AF
CDAF Behaviour
Live image not enlarged
Focusing area enlarged during focusing
Live image not enlarged
Burst Rate:
6 fps up to 30 JPG and 8 RAW frames
7 fps up to 30 JPG and 20 RAW (PEF) frames6 fps up to 6 JPG frames
Top Monchrome LCD:
No
Yes (with limited data, though)
No
RTF Guide Number (at ISO100, 28mm film equivalent):
12
13
12
Tightly Closed RTFNo
Yes
No
Silent Shutter
No
Yes
Yes
Silent Aperture Coupler
No
Yes
No
Mirror VibrationVigorousGentleNone!
Live View Exposure Delay
Long
Acceptable
Shorter
Overall System Time Lag
Long
Moderate
Even Longer
Mass with Battery
650g
750g
560g
AvailabilityNewly marketed but limited supplies, not easy to find
Almost discontinued, not easy to find
Recent major price cut, but yet not easy to find! :-o

Thursday, June 28, 2012

K-30 User Manual and Official Samples Uploaded

http://c758710.r10.cf2.rackcdn.com/files/support/manual/1340052607_Manual_K-30_EN.pdf

http://www.pentax.jp/japan/products/k-30/ex/index.html

It seems that the Pentax photographers like to take backlit photos btw!

Thursday, April 12, 2012

PENTAX Digital Camera Utility 4.35 Update

http://www.pentax.jp/english/support/digital/dc_utility4_win.html

[Main changes from Version 4.34]
  • Added lens data
    [smc PENTAX-DA 40mmF2.8 XS]
    [smc PENTAX-DA 645 25mmF4 AL [IF] SDM]
  • Updated library for reduction of tone jumping.
Btw, as before, I do not understand completely for all the changes. What does the second thing mean? :-o

Thursday, March 15, 2012

5D III User Manual Found Online (Simplified Chinese Version)

http://gdlp01.c-wss.com/gds/1/0300007351/01/eos5dmkiii-im-c-zh.pdf

(Note: Large file, in about 36MB!)


English version has not been found yet. Nevertheless, if you are interested and if you can read Chinese, go download and find out all the details by yourself.

Update (3-16): The English version of the manual can be downloaded here, via Planet 5D Blog.

Tuesday, February 21, 2012

Changing the Focusing Screen of K-5 - Tips and Techniques

I have acquired a ML-60 focusing screen kit recently, which is a good replacement on the standard screen come with the body and it helps a lot in framing and levelling. It is especially fast and practical to use this "eyeball" method rather than relying on the indication by the electronic viewfinder, IMHO. Furthermore, I've found that the build quality of the screen and the bundled tweezers (i.e., the tool) are high and the packing is also well made and clean.


Together with the instruction sheet, there is also a notice for the change of company name from Hoya to Pentax Ricoh, in Japanese, English and French:-


The screen is replaceable by the user, but it is not completely straight-forward and safe from risk, because the screen is quite vulnerable and could be easily got scratched. Do first read clearly the official instructions and use *only* the dual-head tweezers that is provided. However, I don't think the instructions provided by Pentax are clear and detailed enough. So, in this article, I would like to share my own experience and tell more of my tips for the useful techniques of mine and additional cautions that are to be taken.

The ML-60 instruction cannot be found and downloaded from any Pentax website AFAIK, the closest one in contents and yet is downloadable from the Internet would be the one of the (P)Z-1p, available here.

Here is the full instruction of mine, which should including the basic instructions provided by Pentax:-

0. Prerequisite: Do the job at a clean and dry place! And under bright light source!

1. Turn off the camera;

2. Remove the lens and locate the focusing screen holding frame retainer which is a lock at the top middle:-


3. Incline the camera at 45 degrees (e.g., held by the left hand) such that it is not rested completely with the bottom nor rest with the rear screen, but somewhere in-between! (Will explain below for why this is crucial and recommended!)

4. Use the curved long end of the tweezers to "hook" the lock of the retainer upwards to the mount and the focusing screen holder will come off. The focusing screen, with its holder, are actually coming off together by *gravity*:-


Now, let me explain, if the camera is rested on its bottom, the gravity force may be too large such that it comes off too fast and suddenly and the screen may jump off accidentally so it might be scratched! :-o On the other hand, if the camera is put with the LCD rested on the table, the focusing screen and holder may not come off as the gravity force cannot be applied effectively in that direction! So, a 45-degree inclination is recommended! And this has never been told by Pentax in any of their official documentations provided to the end-users, camera model regardless! :-(

Now that reminds me of Canon's design of the tweezers which is just safer and clever as there is also a special protruding small part to hold securely the frame holder *at the same time* when the retainer is unlocked, whilst Pentax' design has none! :-o

5. Swap the tweezers in opposite direction and use the other flat and shorter end with special shape to grip the protruding small part (where the focusing screen model number is printed) to pick the screen out of the box. My own tip is do remember to push the tweezers head until it completely holds the focusing screen with its bottom (which is like a flat spoon) and with both the left and right tips/hands of the tweezers head are in contact with the screen, like this:-


Push with small force as instructed above so that you can feel that everything is secured as it is designed. (But yet it is not clearly told!)

Don't apply too much force as the screen may be pushed off the holder frame and it would yet be scratched!

6. Pick out the screen with great care and put it into the transitional spare foam slot that is used for screen swapping;

7. Pick out the new replacement screen with the same technique for picking the screen as briefed in Step 5 above. Point it to a bright light source and inspect for dust:-


Use an air-blower to blow off any dust that is existent on the focusing screen surfaces as seen, especially for the upper inner surface which cannot be blown for any attached dust once the screen is installed and until it is uninstalled again- Pentax' instruction has never reminded the user to inspect and blow off the dust, although once again it may be sort of common sense, but still I think this essential reminder should be given;

8. After the "cleaning" has been done, carefully put the screen back onto the holder frame so that it should NOT be in touch with *anything* until it finally land and rest evenly and correctly within the frame holder;

9. Swap the tweezers' end again and use the curved long nose to push back the focusing screen holder until a click sound is heard. The screen is installed successfully!


10. Point the camera to the light source, look from the mount (as above) and then look the viewfinder from different angles and do a final check if everything is okay! :-D


After all, this ML-60 screen is actually a very good piece of optional accessory and is very useful to help keeping proper levels for framing and picture composition and is highly recommended for every K-5/K-7 user! At least last time the Silver Limited edition of the K-5 is bundled with it. Highly recommended!

N.B. The focusing screens of the K-5/K-7 has more obvious matte which facilitate manual focusing and do have more accurate DoF than that of the lower grade Pentax penta-mirror DSLR models, for what I observed.


Read Also:-

When the Focusing Screen Lies (for Focusing and Metering)

When the Focusing Screen Lies - Part 2

Wednesday, December 14, 2011

CIPA Specification Guideline for Digital Cameras

Document CIPA DCG-002-2007:-

In English: http://www.cipa.jp/english/hyoujunka/kikaku/pdf/DCG-002_E.pdf (Translated Version)

In Japanese: http://www.cipa.jp/hyoujunka/kikaku/pdf/DCG-002_J.pdf (Original Document)

An interesting document which quotes the reference (inter)national standards and illustrates some of the basic definitions of parameters, the preferred formats and the testing methods, etc. Worth to have a look if you're interested in all those technical stuff.

N.B. CIPA stands for (the Japanese) Camera & Imaging Products Association.

Wednesday, November 30, 2011

Supported Pentax DSLR Functions with Different Pentax Lenses

Read this question at the PF and I was surprised to see the reply by the site owner Adam (i.e., the first reply to the OP), which shows that Adam completely lacks the basic user/operation knowledge in using older manual (aperture) Pentax lenses on any Pentax DSLR! :-o

Maybe Adam has been given too many of the latest Pentax lenses (for "reviewing" or whatsoever) so that he has almost forgotten how older Pentax manual lenses would behave on all the Pentax digital bodies. Nevermind, I think it's my take now! Below are two summaries that I compile to let all my readers here know (or got refreshed for the knowledge if already known) about the basic technical features or limitations of our Pentax lenses back to the 60s of the last century and what they could or could not do for us with our Pentax DSLR bodies! :-)

N.B. I don't think that you can find ALL of the information below in any of the Pentax DSLR/lens user/operation manuals! ;-D


Table 1: Lens Data/Function Availability with different Pentax Lenses

Lens Data and/or Function
Provision Means
M42
K/M
_A_
_F_
_FA_
FAJ/
DA/
DAL
DFA
(1st
Gen.)
DFA
(2nd
Gen.)
Wide-opened Metering
Instant Return Aperture Coupler-
Y
Y
Y
Y
Y
Y
Y
Number of Steps Stopped-down (via Aperture Ring)
Mechanical Position Indicator-
Y
Y
Y
Y
-
Y
-
Maximum Aperture
Array of Electrical Contacts
-
-
Y
Y
Y
Y
Y
Y
Minimum ApertureArray of Electrical Contacts-
-
Y
Y
Y
Y
Y
Y
Focal Length
(Advanced/Serial) Electronic Communication
-
-
-
Y
Y
Y
Y
Y
Focus Distance
Electronic Communication-
-
-
Y
Y
Y
Y
Y
Lens IDElectronic Communication-
-
-
Y
Y
Y
Y
Y
MTF Data
Electronic Communication-
-
-
-
Y
Y
Y
Y
Powered/Auto Zoom
Electronic Communication and KAF2 Power Contacts
-
-
-
-
S*
-
-
-
In-lens AF (SDM or DC Motor)
Electronic Communication and KAF2 Power Contacts-
-
-
-
-
S
-
-

Legend: Y= Yes/Available; "-" = No/Not Available; S = Supported depending on Lens Model (if Feature is Available)


*Remark: Limited/Partial Function - Only Auto Zoom Retract and Powered Zoom are Supported.


Table 2: Pentax DSLR Camera Function Availability with different Pentax Lenses

Body Function
M42
K/M
_A_
_F_
_FA_
FAJ/
DA/
DAL
DFA
(1st
Gen.)
DFA
(2nd
Gen.)
*Remark
Wide-opened Metering
-
-*
Y
Y
Y
Y
Y
Y
Stopped-down metering is available with a push of button.
Multi-segment Metering
-
-
Y*
Y
Y
Y
Y
Y
Not as accurate as subject distance information is Not available (and hence is not included in the calculation).
Off-the-film TTL Flash Auto (*ist D and DS/DS2 Only)
Y
Y
Y
Y
Y
Y
Y
Y
TTL flash sensor underneath mirror is installed; No Pre-flash is required.
Off-the-film TTL Flash Auto (All Others)
-
-
-
-
-
-
-
-
No TTL flash sensor underneath mirror; P-TTL is mandatory for Auto Flash.
P-TTL
(where P stands for Pre-flash)
-
-
Y*
Y
Y
Y
Y
Y
Not as accurate as subject distance information is Not available.
AF
-
-
-
Y
Y
Y
Y
Y
-
Lens Correction on Image
-
-
-
-
-/Y*
Y
Y
Y
Only the three FA Limited are Supported.

Legend: Y= Yes/Available; "-" = No/Not Available


Okay, is it and everything much clearer now? :-> And no need to make thanks to me, thank Adam instead! ;-p After all, I just won't make any reply over his premise to help others (and actually help him to make more money!) anymore (although Adam is really "kind" enough for not banning me!), as I decided and told two-and-a-half year ago! :-D


Further/Reference Read:-

K-Mount Metering and Exposure Bases - A Technical Brief

Related:-

Two Important Custom Functions for Proper Metering

Modding a Rikenon-P 50/1.7 Into an "A" Lens! :-o

Ten Things that I Want Ricoh to Do for Pentax

Hypocrites of the PentaxForums and Their Lies

Updating of my Blog Editing Direction

Wednesday, November 16, 2011

Hair Dry a Dead SDM Does Work (Again)!

Further to the last big discover for how to revive a dead SDM even the last method didn't work, I've seen this report lately which verifies that the new (escalated) method does work to bring back live again for a dead (stuck?) SDM! :-o

http://www.pentaxiani.it/forum/viewtopic.php?f=1&t=49524&start=15#p678566

(Google English Translation Here)

Nice! Should Pentax should include these two methods into their service manuals of all the SDM lenses such that they need not to provide expensive quotations to the SDM users anymore for total SDM replacements and at least Pentax should try these low-cost repair methods at the first place instead! ;-D

Monday, November 07, 2011

A (Pentax) Camera Catalogue Collector

Who? It's Me! :-D


Indeed, the above is only a very partial set of items in my collected camera catalogue archives. In the old days, printed catalogue was the most effective official means to provide product information and to promote products. But anyway, those were the days. With the rise of the Internet, nowadays, catalogues are almost "useless" than they were. Even if they exist, we mostly read them in pdf form or etc.

P.S. A "group" photo of my Ricoh catalogues may come.


Related:-

What Will be My 10th/Next DSLR/ILDC Body?

Hotax Has NOW Been Rictax! ;-D